Many times I get the question from students and faculty that have never conducted an interview, “What equipment do I need?” That question is sometimes tricky because it depends on where the interview are being conducted. There are different parts or accessories to equipment depending on the location. For example, fluorescent and tungsten lights project differently off of skin, conducting an interview outside rather than inside requires different sound equipment, an interview while someone is walking rather than sitting requires a steadicam or specific technical skills from whomever is running the camera. With each type of interview, the equipment matters. For this post, I will be discussing the essential equipment needed for a basic sit down interview in a room with one person being viewed in the camera frame.
The essential three parts necessary are:
1.Camera or a video recording device
2.Tripod
3. A sound recording device
Optional if necessary:
4. Lighting equipment
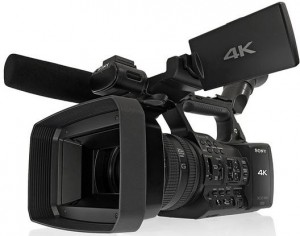
The first piece of equipment is the camera or video recording device. I say video recording device because people now record interviews off of their cell phones or other types of recording devices (ipads/tablets). Whatever video recording device that it used, make sure that the person is in the camera frame and the device is recording when you want it to record.
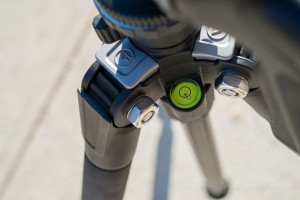
The second piece of equipment, the tripod, functions to hold a recording device in a stable and leveled position. What I find is that many beginners forget to check if the tripod is leveled. Many tripods have a level attached, usually located just above the top part of the legs (see the figure below). Make sure that the bubble of the level sits in the center of the circle and the camera should have leveled frame. I level the tripod after the camera is placed on top. The reason being that when you are sliding or clipping the camera on the tripod, most of the time the legs of the tripod move, causing it to be unbalanced. I suggest making it a normal practice to level once the camera is secured on top of the tripod.
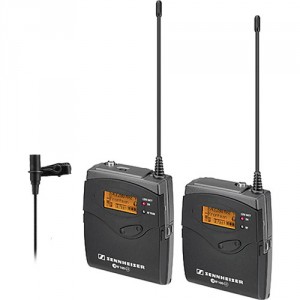
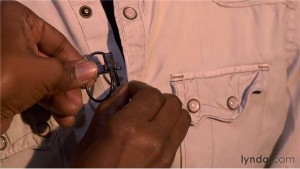
The third piece of equipment is usually the most often neglected and is ABSOLUTELY just as important, if not more important than the video footage of an interview. That is the sound equipment. For interviews, what many beginners and in some cases novice filmmakers will do is film using the microphone that is attached to the camera or video recording device. I highly recommend only using the sound from the camera mic as backup. When using the camera mics, the sound in the room both near and far is captured and there is no way of separating that sound after it is recorded. For some reason many people think that a sound editor can listen to a sound recording and separate all of the individual sounds of an audio track. That is a unfortunately a myth. There are certain ways to save all of the separate sounds as one file, but when opened in a professional sound recording software, all the individual sounds are separated on different tracks. That only works when sound is recorded on separate channels (i.e. an interviewee is recorded on one channel and the interviewer has a separate mic and is recorded on a different channel). The sound that the camera mics record are all placed on the same audio channel, so the sounds cannot be separated afterwards. With that said, for conducting interviews whereby the voice of the interviewer will not be in the final video project, I suggest using a wireless lavalier microphone, like the sennheiser above. One end is a receiver that plugs into the camera or recording device, the other end is the microphone that clips on to the interviewee (shown below). If if interviewer’s voice will be in the final video, I suggest using an additional wireless lavalier. If the video recording device does not have ports for the sound to plug into, the easiest suggestion I have for a basic interview is route the wireless lavaliers into an H4n (shown above). The lavaliers should come with an XLR cable that plugs directly into the H4n. For technical questions on how to use any of the equipment, a GOOGLE search is your best friend 🙂
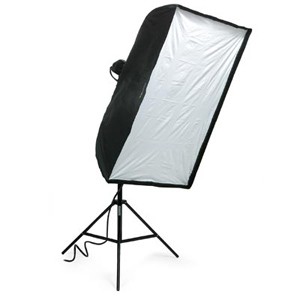
The final piece of equipment, and it is optional, is lights. I say optional because in some settings the combination of the room lights as well as the many ways video recording devices can be manipulated, lighting equipment is not always necessary. Also lighting equipment is usually the heaviest piece of equipment and takes the longest to set up. If it is necessary, make sure you give yourself some time. For the majority of basic interviews, a large soft box or two small soft boxes (shown above) are all that will be needed. Again, for best ways to set them up, GOOGLE is your best friend 🙂
I hope this helped!
Ameer




your post is useful, i can learn about how to make recording with a quality, great post
always wanted to try, i wanna see if i really have some kind of passion in this field, but hell, i don’t even have moeny to buy those -_-
subhanallah your images is good i like this is hehe nice ya 🙂