Hi everyone,
Don’t tell me it’s already Spring Break? Mamma mia, time does pass by quickly. Anyway, I want to share with you some stuff that I’m currently working on. This is mostly going to be interesting for those of you who have an interest in audio post-production especially as it relates to dealing with the kinds of issues that pop up when you produce videos.
So, as you know one of my projects is about recording a couple of videos that not only promote hybrid teaching (some also call it blended learning) but videos that offer advice for faculty and students who want to try out hybrid forms of learning.
While the video has already been cut, there are still a couple of problems as far as the audio is concerned. For one, our interview videos will have music running in the background, so we need to make sure that the music doesn’t overpower the speakers. So, some level adjustment is in order. Besides that, we will have to deal with some unwanted noise issues that were part of the recording process. So, what I am going to do now is run you through the way I deal with these kinds of things. That is not to say that it is the only solution. It’s simply my way of working.
The steps I will be running through quickly are: cleaning, level adjustments, filtering out hum, compressing, and limiting. All of those steps I applied to the vocal performances.
On a side note, I am using Pro Tools for all of this. However, all the things I will be doing with those audio tracks can also be done with other programs such as Logic Pro, Cubase, Ableton Live, or GarageBand. I’m just most familiar with Pro Tools.
Before we begin, if you interested in learning more about audio recording, mixing, and post-production then check out the tutorial videos on Lynda.com. GSU has access to the entire Lynda catalog of videos. You can use your campusID and password to sign in. Once you have access, I suggest you check out the following videos: “Audio Mixing Bootcamp,” “Foundations of Audio: EQ and Filters,” and “Foundations of Audio: Compression and Dynamic Processing.”
I have learned a lot from watching those.
1. Cleaning up and Volume Adjustments
Below you see my point of departure. I started out with a total of four tracks. From top to bottom: the video track, a reference track that contains speech as well as music, then a track that contains all the interview bits, and finally the background music track.
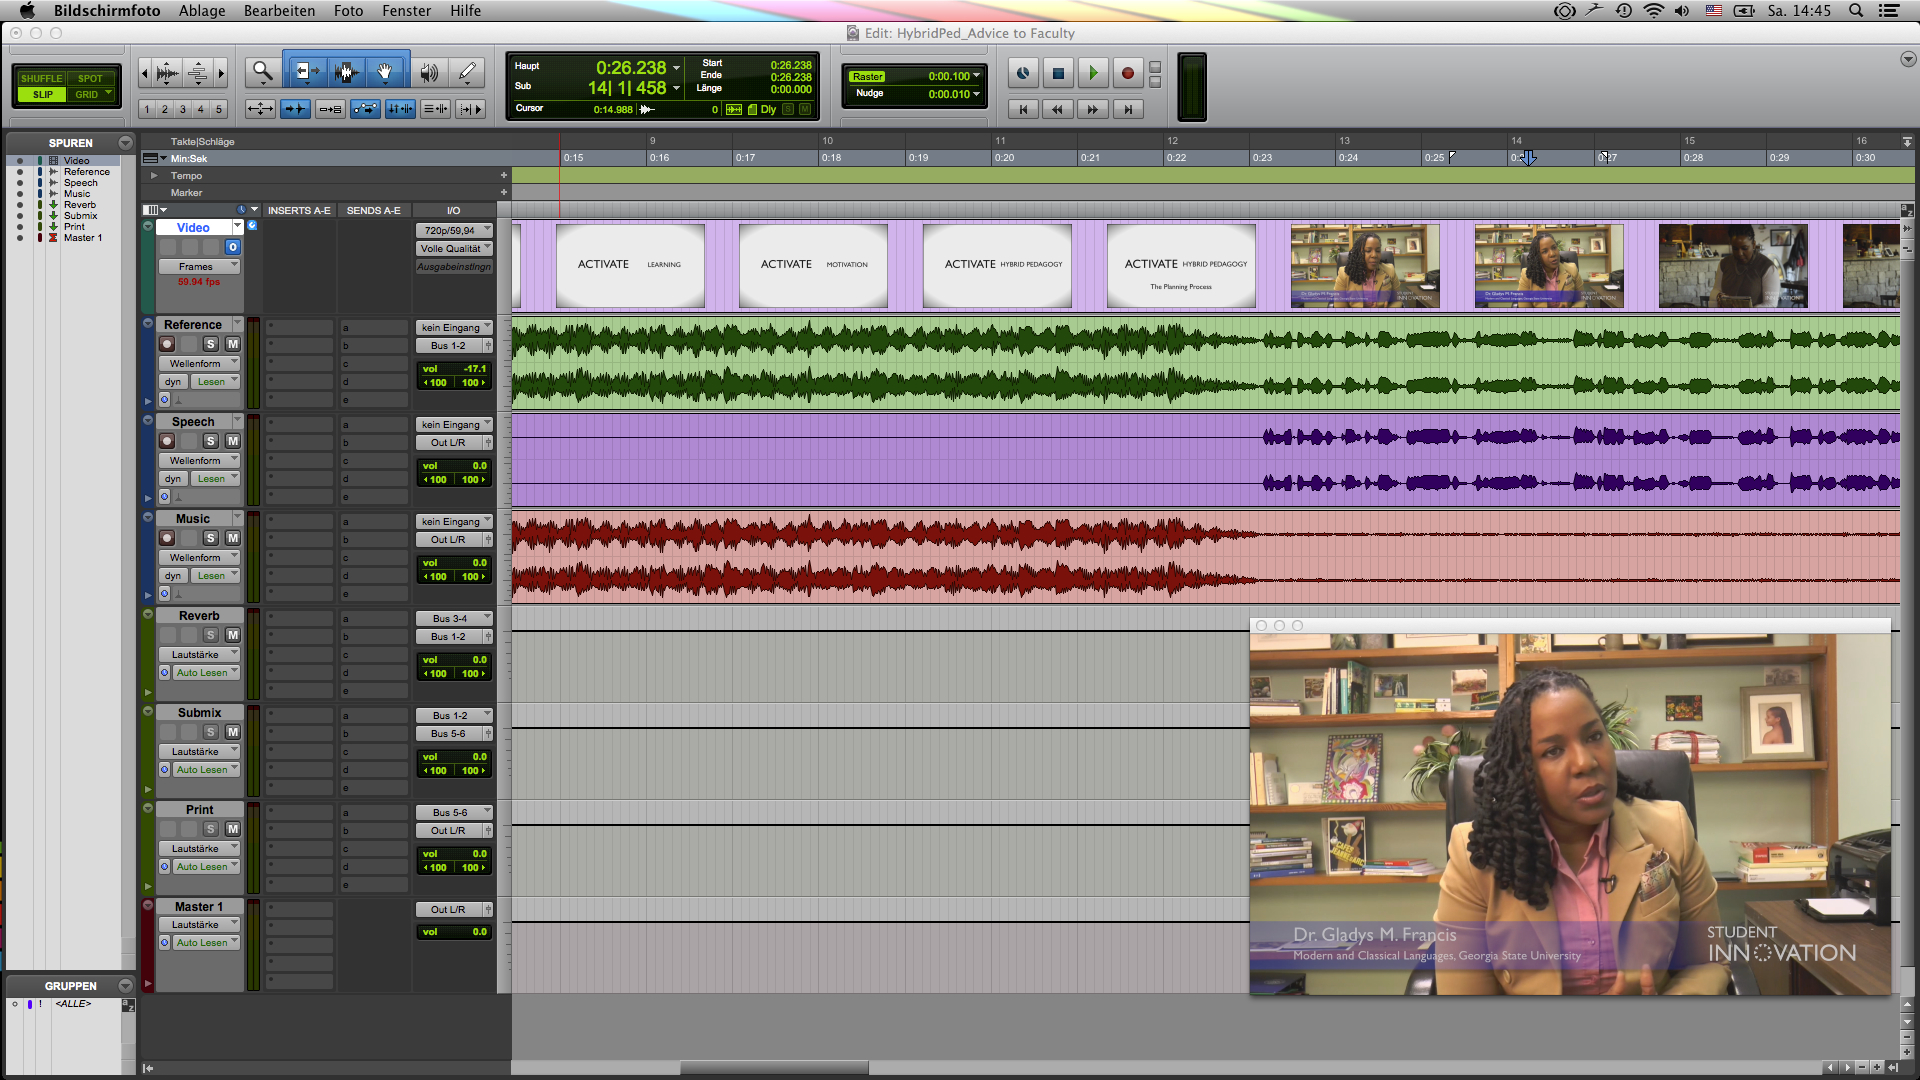
What I already know is that since we’re dealing with four speakers (three women and one man), we’re going to run into issues if we processed the voice track as a whole. Each speaker will have a different timbre, so if the processing works for one speaker, it will surely not work for the other three. Therefore, I cut the voice track and created new audio tracks, so that I can apply the processing for each speaker individually. I have to say, though, that the musical background was already sufficiently processed, so I didn’t have to deal with that. Usually, what you want to do when you have music as part of a video interview is to have it automatically decrease in volume when there is speech, and then increase again to compensate for the lack of speech. This automatic volume adjustment is called “ducking”. If you look at the image below, you will see the music track at the bottom. Notice, how the waveform is bigger when nobody speaks, and much lower when there is speech.
Now that this is done, I can start dealing with the biggest issue: noise. I’m sure most of you have experienced the kind of background noise I’m talking about. Take for example a poorly produced home video that’s been uploaded onto Youtube. Oftentimes, in the background you hear a strong hum, or hiss, and that distracts you from listening to the content of the video. One of the most common background noises is the so-called 60 Hz frequency hum, caused by electro-magnetic vibrations. Let’s hear it.
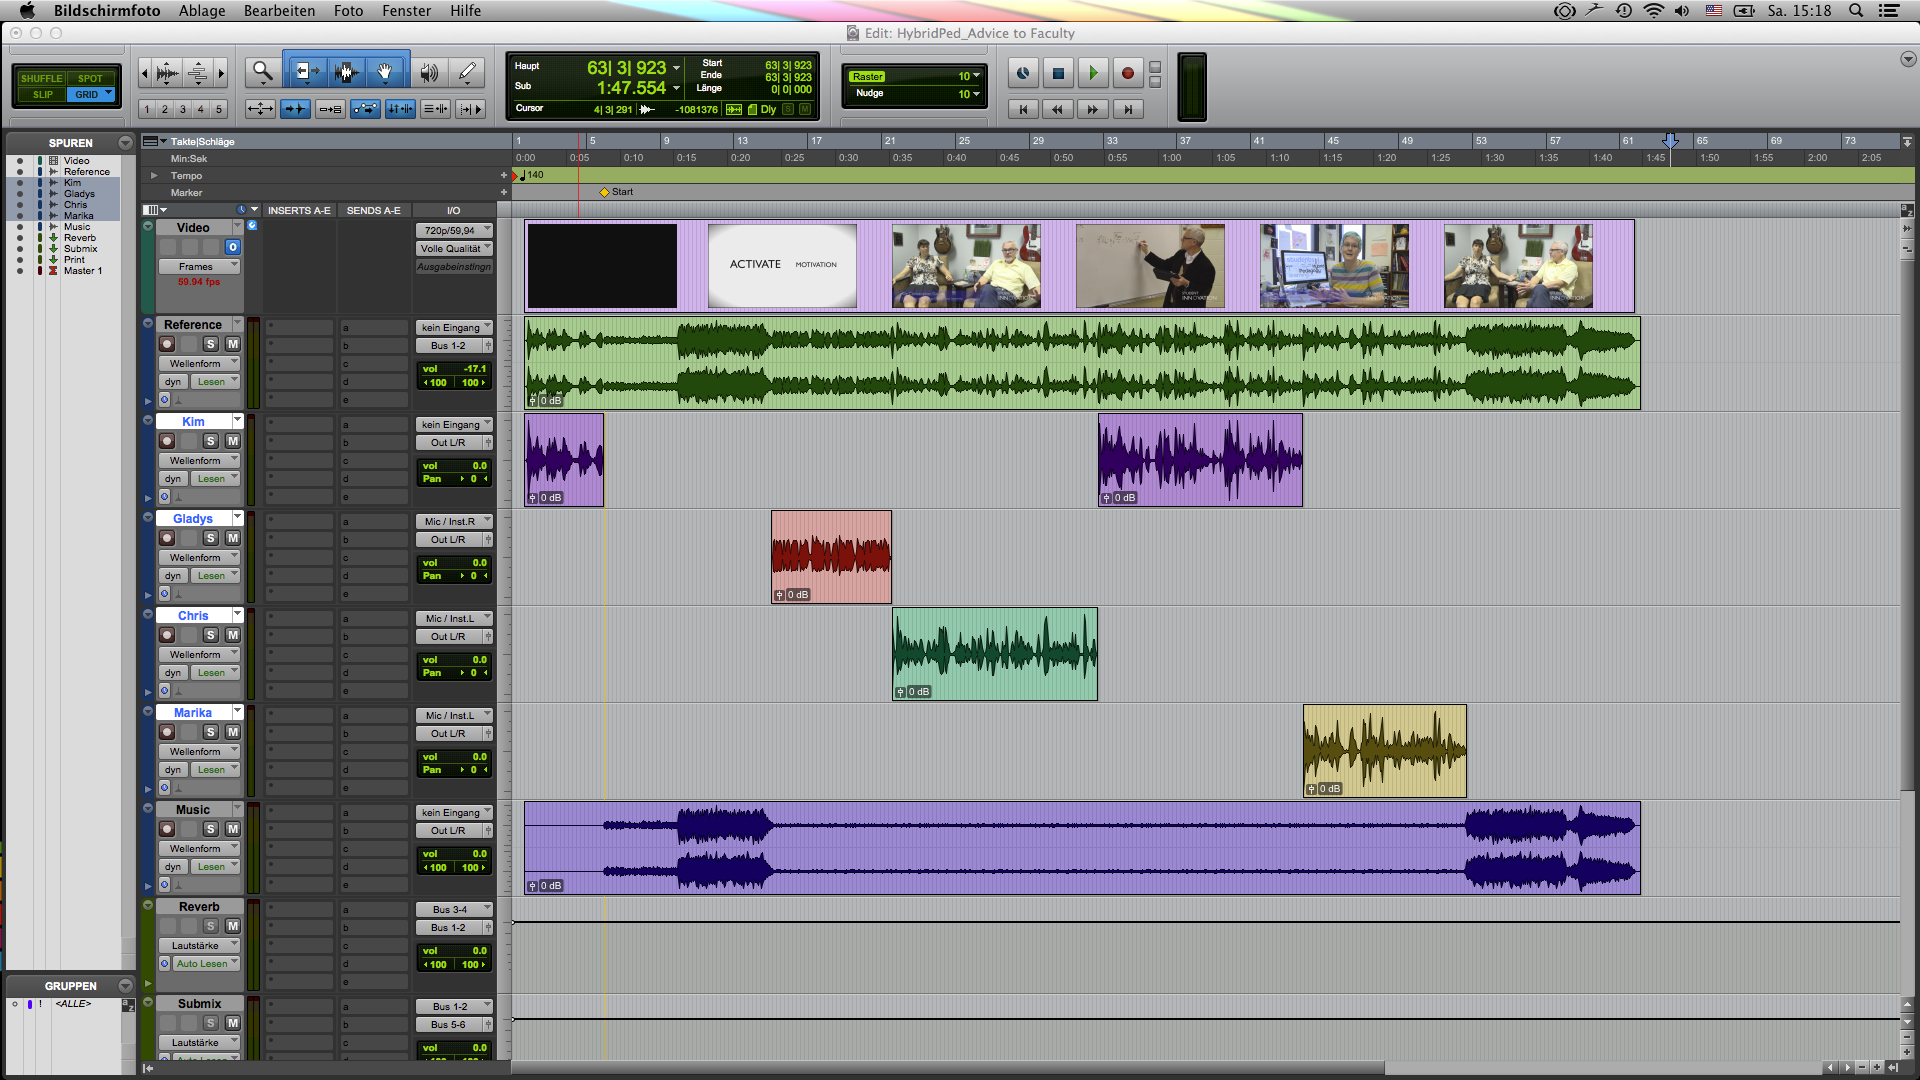
There are two ways of dealing with this. The first is to use an equalizer–basically a frequency-based volume control–locate the 60 Hz frequency, and notching out that frequency with a very narrow bandwidth. The other way is to use specialized audio plugins for that purpose. The benefit of a specialized audio plugin is that background noises such as buzz and hum not only occur at the core frequency, but they also translate up the frequency range in regular intervals, which are called harmonics. I gotta admit, I was a bit lazy, so I went straight with option two. Also, I went straight to filtering out everything from Kim’s vocal track below 100 Hz since her voice doesn’t use that frequency range at all. Be careful, though, when you use filters. You don’t want to set the filter too high. 75-100 Hz is usually good for male voices, 100-125 Hz for female voices. This is what it looks like:
As you can see (you might have to zoom in a bit), you’ll see that the first frequency (no# 1) is set to 120Hz. With a simple press of a button, the other four frequency bands automatically settle on the remaining harmonic frequencies above the core frequency. Let’s hear it:
With noise:
Without noise:
You can do the same thing with a regular equalizer. You just need to make sure that you find those upper harmonics.
To conclude the first step, I did some minor level adjustments so that all the speakers are roughly equal volume.
2. Using the Equalizer
Once I was happy with the results, I moved on to applying some equalization of the signals. I knew that I would be using some compression (basically automatic gain adjustment) later on to take care of smooth out the tracks, and avoid audio spikes from happening. Therefore, I applied some equalization before the compression because I didn’t want the compressor to react to frequency content that I didn’t consider relevant.

I understand that this whole window must seem confusing, but what I want you to look at is in the lower right corner. There you see a visual representation of the equalizer. In almost every recording, there are parts of the audio signal that become problematic when multiple signals are played back together. Then, certain frequencies start to compete with one another. Perfect example is a vocal and a guitar. Both instruments use a similar frequency range. Still, within that frequency range, there are parts which really help the guitar while others really help the vocal when played together. Therefore, it’s common practice to cut out some frequencies from the guitar to make room for the vocal, and vice versa. That’s pretty much the basic idea of mixing.
But moving back to the work at hand. I carved out some unnecessary frequencies to make the vocal sit better with the music in the background.
3. Compression
There are entire books that discuss compression, so I won’t be really going into details. However, to give you a general idea about compression and what it does: let’s say you’re driving in a car with your mother. Your favorite song is playing on the radio, but parts of the song your mother finds too loud. So, whenever she thinks it’s too loud she reaches for the volume knob and lowers the volume. That’s compression basically. It’s automatic gain control. A compressor usually works with four parameters: attack, release, threshold, and ratio. Going back to the car analogy: attack is the amount of time it takes your mother to reach for the volume knob on the radio, release is the amount of time it takes her to bring the volume back up once each loud part of the song is over, threshold is the volume level above which your mother freaks out because it’s too loud, and ratio translates into the amount of volume that she attenuates. In essence, a compressor is a tool that you can use to deal with sudden peaks in the audio signal, thereby smoothing out the performance.
Coming back to the video, take a look at the following image, and notice the wave form in the yellow-colored block:
As you can see, there are a couple of spikes in the signal. Using a compressor can help taming those audio signal peaks in order to create a more even performance. Below is an image of the compressor I used to level the vocal performances.

4. Taking care of Sibilance
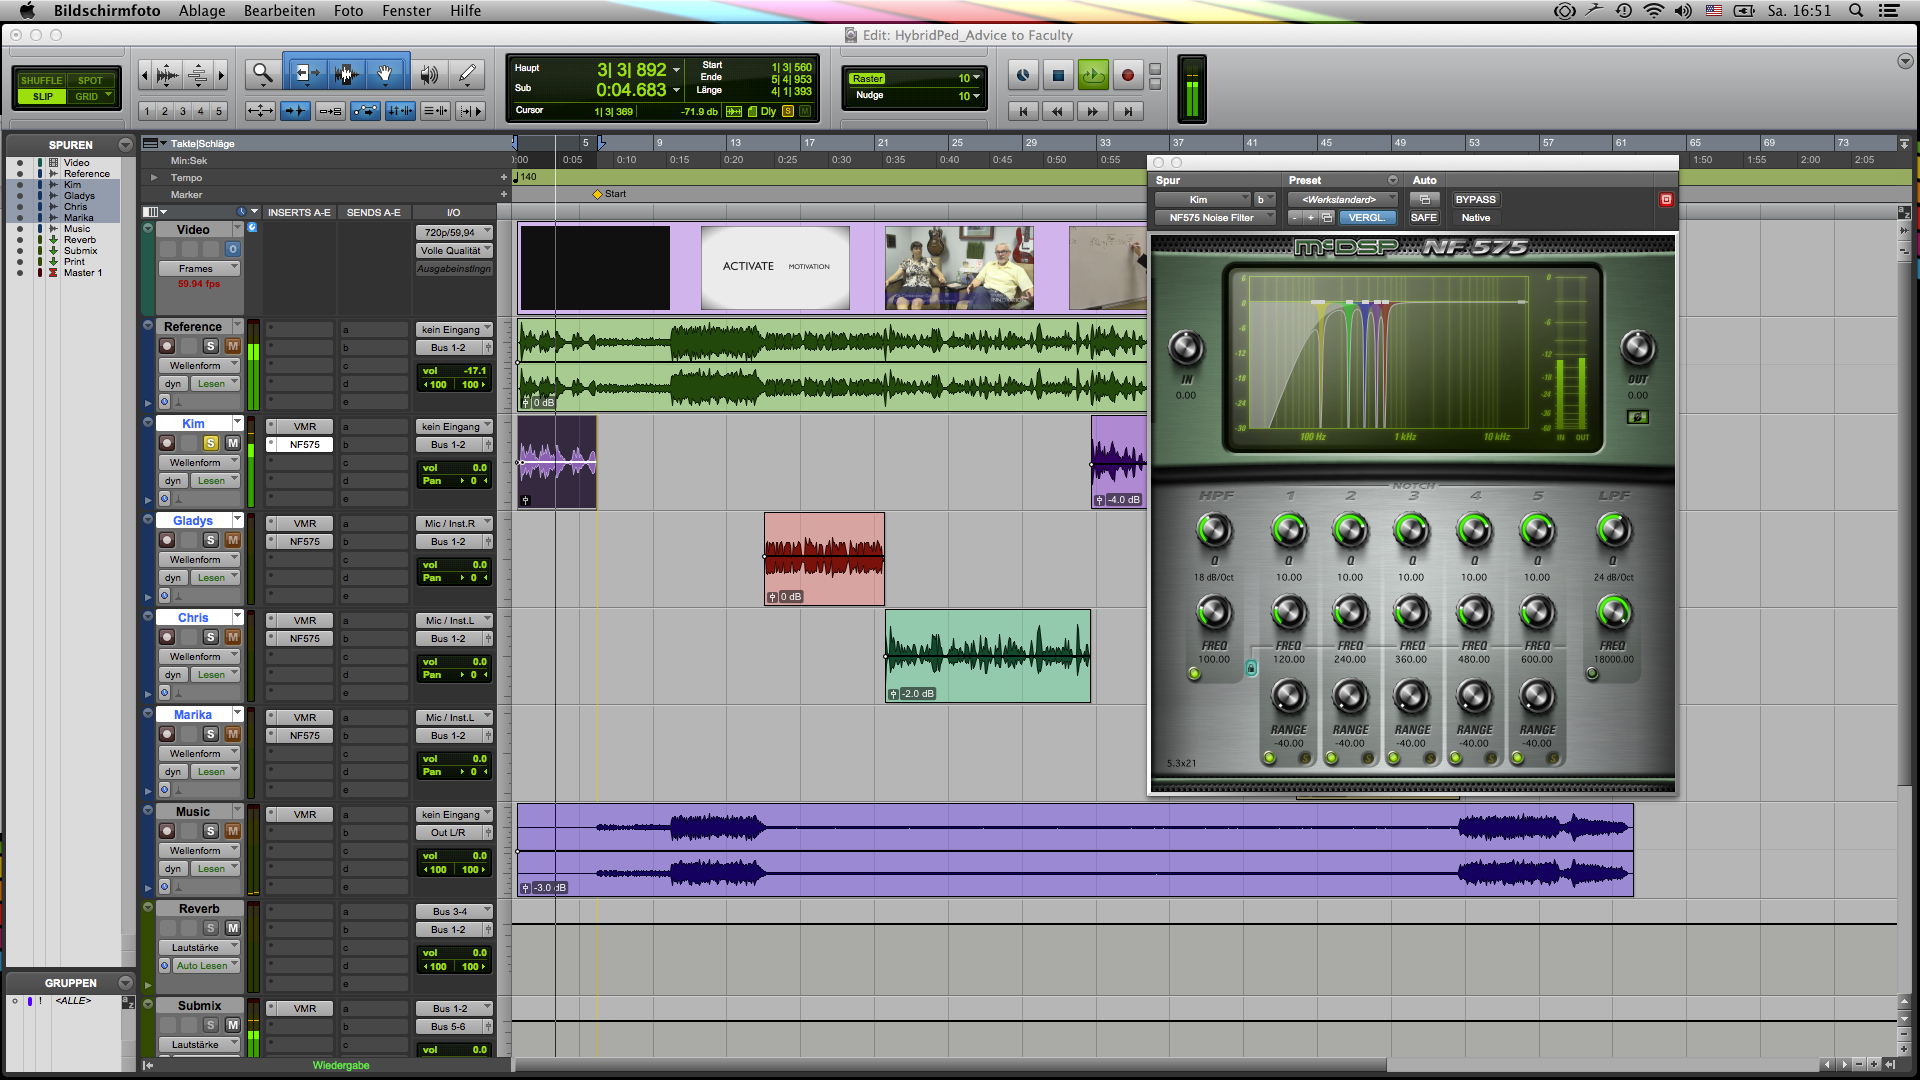
Oftentimes, especially with vocal performances, we also deal with unwanted high frequencies that occur when words are spoken that contain S’s, F’s, P’s, and T’s. The most common issue is with the S’s. I’m sure you’ve all experienced a situation when this can become quite distracting. To deal with those unwanted kinds of sibilant hissing noises, I use a specialized compressor, called a “de-esser.” This particular compressor can be set only to those sibilant frequencies without affecting the rest of the audio signal. Below you’ll see an image of the de-esser I’ve used:
If you look closely, you’ll notice that the top left of the plugin contains a visual representation of the frequency spectrum. Below there are three control. I’m using the “Freq” button to set the desired frequency where the sibilant noises occur, in this case 5812 Hz. Then I lower the threshold on the right until the S’s are being attenuated. Watch out, though. If you set the threshold too low, then too much of the sibilance is lost, and the speaker will sound as if he or she has a lisp.
Let’s hear what the de-esser does to the signal. Listen closely to the words “teaching” and “course”:
Without De-essing:
With De-essing:
The key is not to get rid of the sibilance entirely. Then it wouldn’t sound natural anymore. But you do want to tame them.
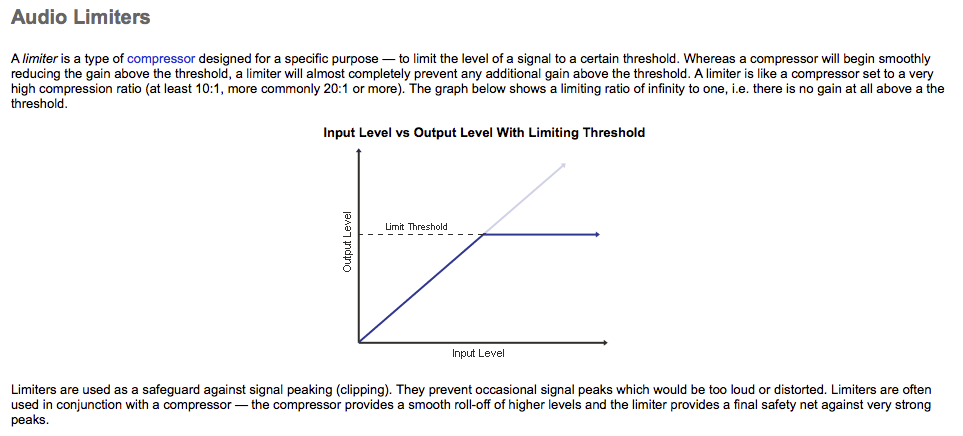
5. Limiting
As a last step, I used some limiting to bring the entire audio signal to a more reasonable level. Limiters are special kinds of compressors that usually come into play at the end of the signal chain to prevent the audio signal from clipping/distorting. Here is a great explanation taken from Mediacollege.com of what a limiter does and how it differs from a regular compressor:
And that pretty much concludes what I’ve done to the audio signals. We will be showcasing the videos at our end of the semester showcase.
I wish you all a great Spring Break!
Best,
Thomas