The second round of Webex updates will be live on September 15! For a recap of what has already been updated, please see our previous blog post. Below is a preview of what to expect on September 15.
Video Breakout Sessions in Webex Meetings
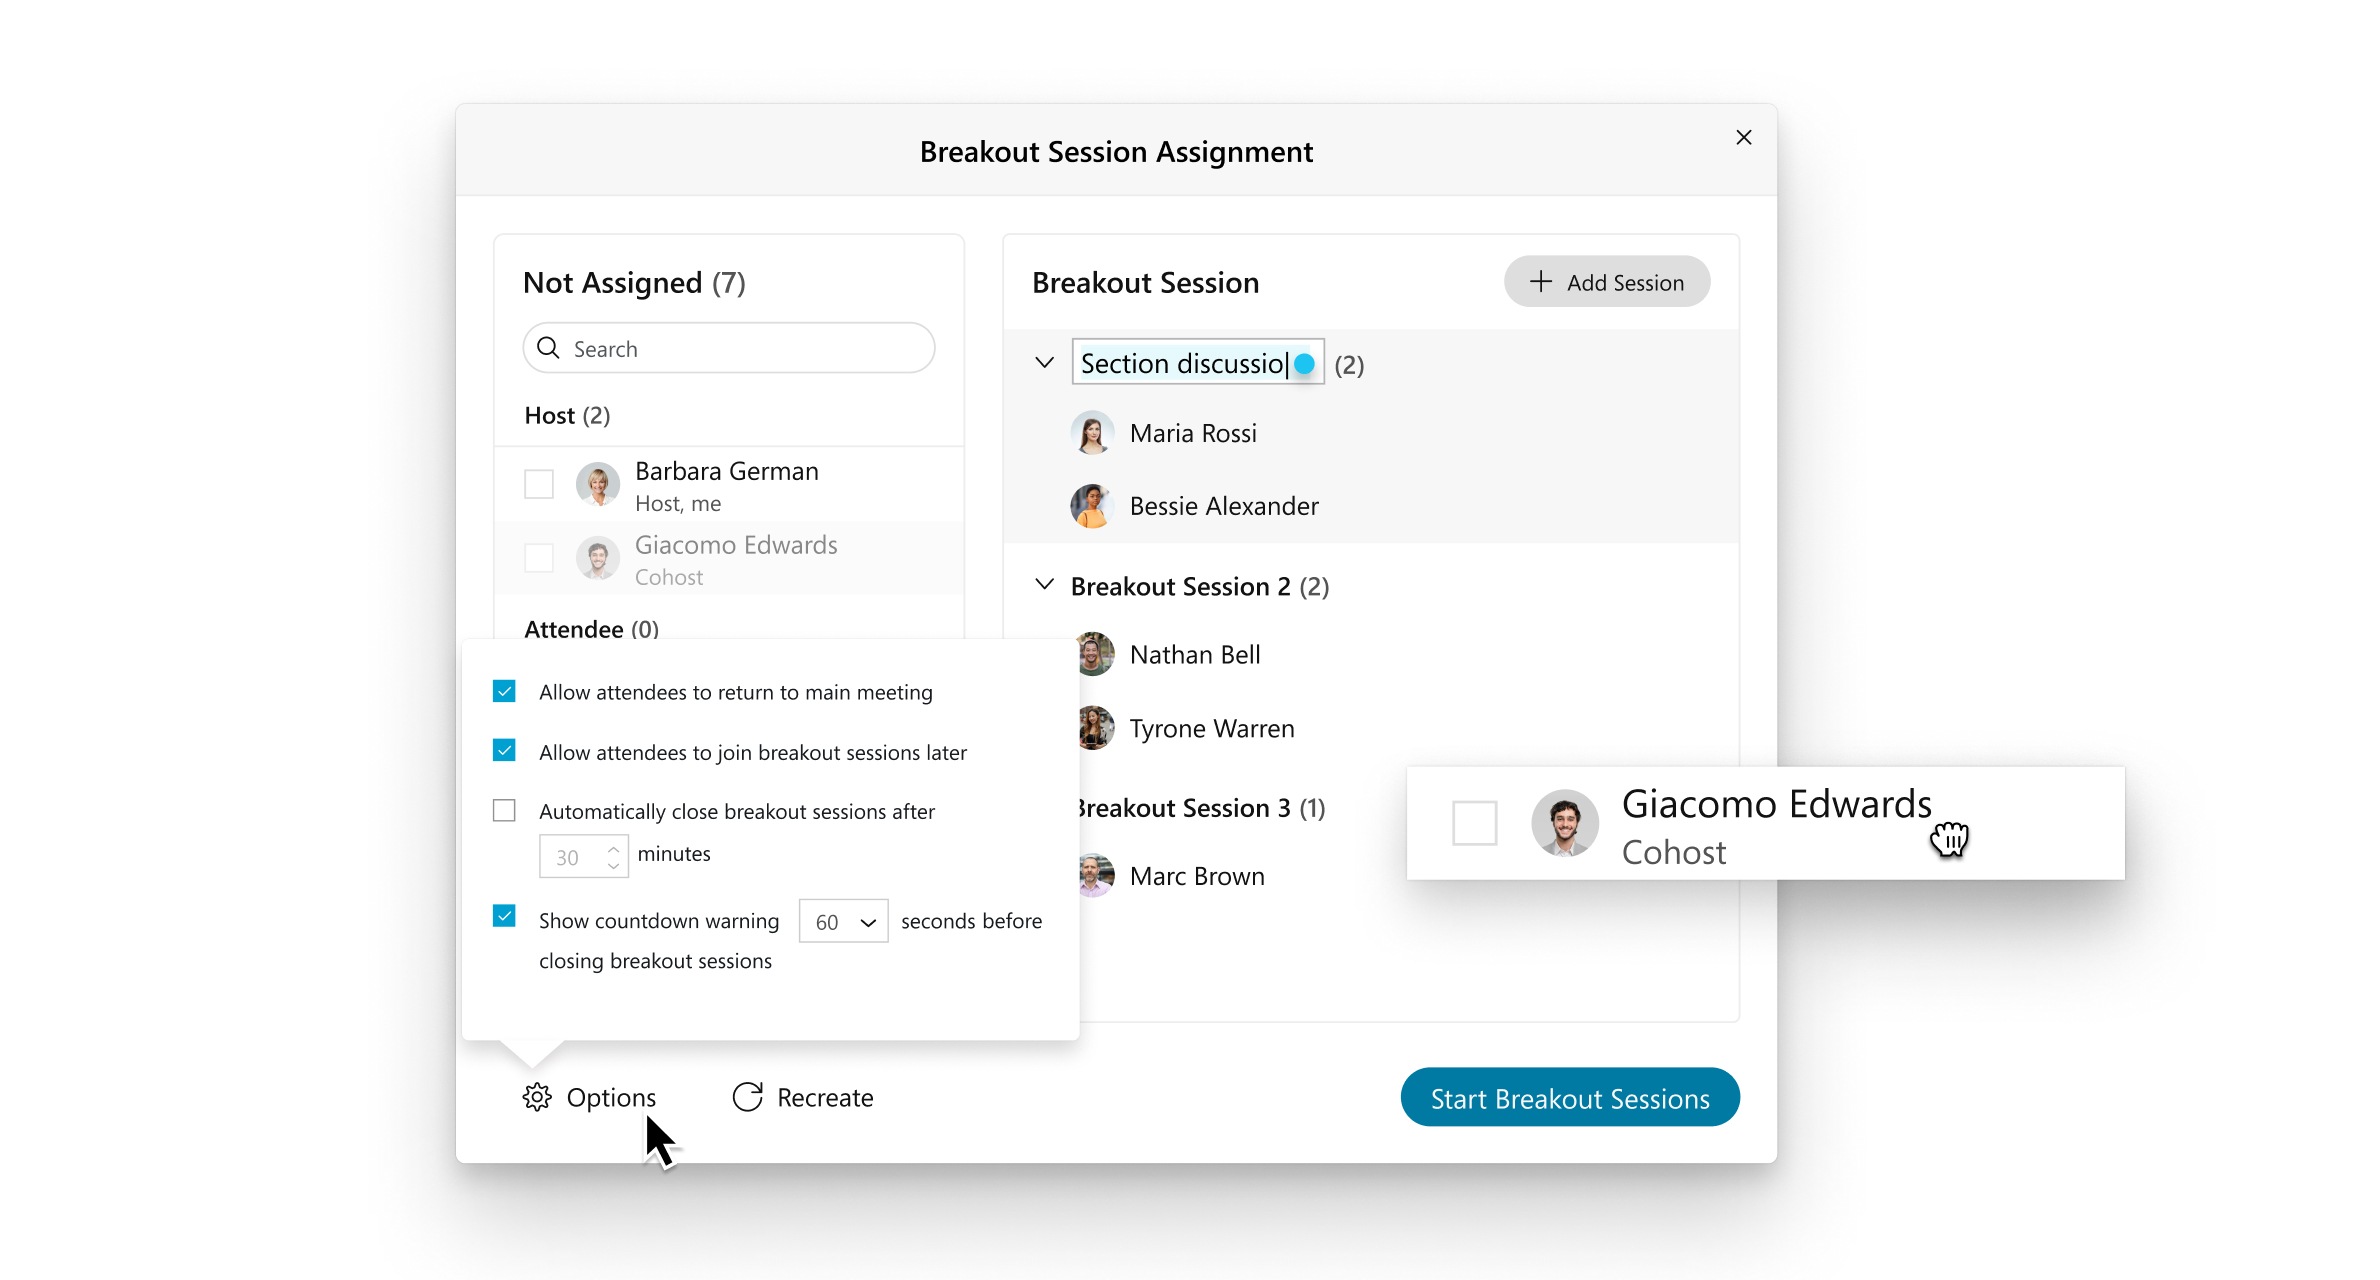
Breakout sessions in Webex Meetings is an improvement over the current Breakout Room functionality in Webex Trainings. Breakout sessions allow you to place your meeting participants into smaller groups to collaborate and share ideas. This is great for workshops, classrooms, or for when you just need a moment to talk privately with a few others outside of the main session.
Breakout sessions are easy to create and manage. You can assign participants to breakout sessions manually, or you can have participants assigned automatically. Inside of the breakout session is like being in a smaller meeting, complete with audio and video where participants can collaborate and share content. Participants can even ask the host for help from the main session. The host can bring everyone back into the main session at any time or after a scheduled time limit.
In-Meeting Cohost Role
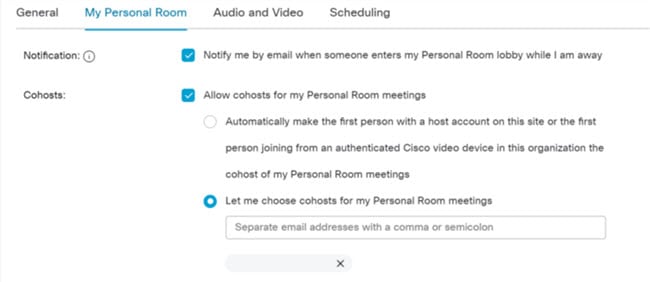
As a meeting host, you can now assign other meeting participants as cohosts. Cohosts share your host-level privileges like muting and unmuting other participants, moving participants to or admitting participants from the lobby, and more! Cohosts can also end the meeting, so if a cohost needs to leave a meeting early, they should close the Webex window and choose to leave the meeting, not end it!
Cohost is the evolution of the previous alternate host role. The “alternate host” setting has been renamed to “cohost” so that “only the first cohost with a host license can start the meeting. Everyone who previously had set their meetings and personal rooms to “anyone can host” will be automatically transferred to this new setting.
You can also assign cohosts on the fly, directly in-meeting, by simply right-clicking the participant and changing their role to Cohost.
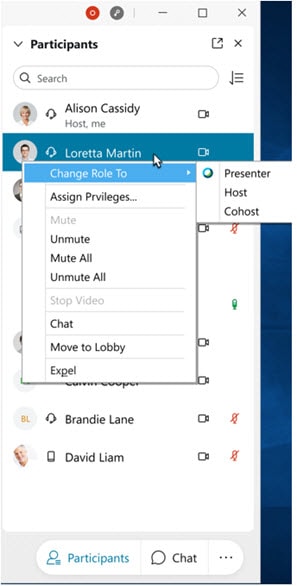
You can have as many cohosts in a meeting as you wish.
In addition to these new features, here are some updates you may have missed:
Virtual Background – Choose Your Own Custom Image
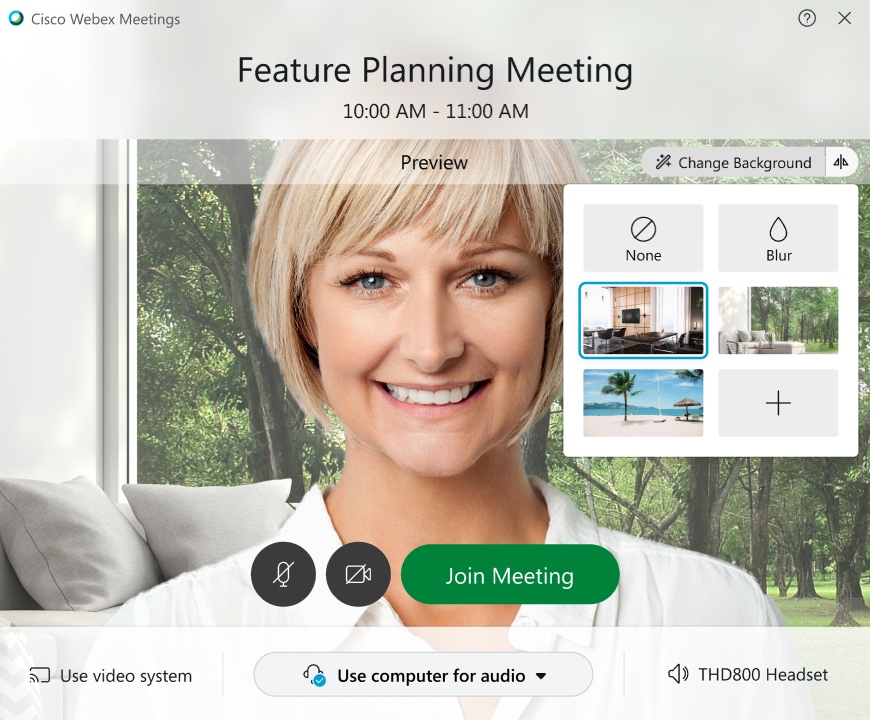
On Windows and Mac, when selecting a virtual background, you can now choose your own image from your computer to be used. For the best results, use an image that is greater than or equal to 1280 x 720 pixels. Windows users who have not previously used the virtual background feature will be prompted to download the virtual background package the first time they choose to use a virtual background.
Polling in Webex Meetings
Polls are now available in Webex Meetings. To start a poll:
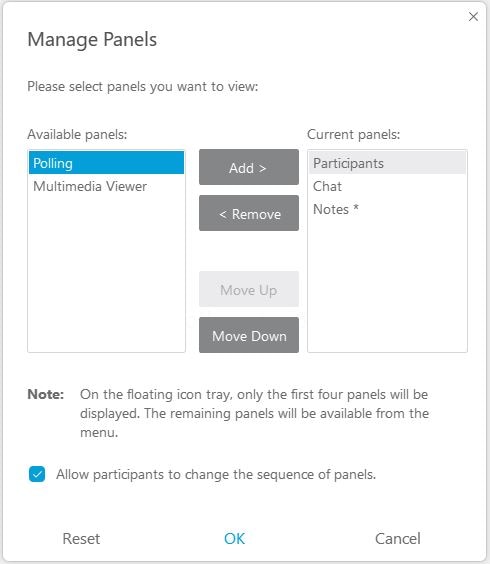
- Select View > Panels > Manage Panels to add the Polling panel to your meeting.
- On the Manage Panels page, select Polling from the Available panels and click Add. Then, click OK.
- Select the question type from the drop-down list in the Question section of the Polling panel.
- Select Short answer if you want a poll with a type in short answer.
- Select Multiple choice – Multiple Answers if you want a poll with multiple answers from a list of possibilities.
- Select Multiple choice – Single Answer if you want a poll with one answer from a list of possibilities.
- Click New to create a new question.
- Type your question in the text box that appears and press Enter. In the text box that appears, type an answer to your question and press Enter.
- (Optional) Repeat this process for as many questions and answers that you want to add.
- Click Open Poll.
