My journey on the 3D viewer


    3D graphics has been occupying a big part of my interest ever since I learned to play video (which was before I learned how to speak, surprisingly.) I always feel motivated to learn more about the sophisticated techniques to render wonderful 3D images. Actually learning to write OpenGL (a real-time graphics library) code was long overdue. That was the main drive for me to sit down and learn to create a 3D model viewer from scratch. The 3D viewer is now a part of the Unpacking Manuel’s project.

    Prior to creating the 3D viewer, I spent a lot of time looking at many 3D shading techniques. I had also worked with shaders in Unity game engine so I was more or less familiar with the concept of shading. In fact I set out one week of my time to create a shader pack to further understand what went on under the hood.

   Even though I was able to write shader code in Unity, I thirst for advanced 3D graphics was not quenched. Unity still handled most of the heavy lifting like Physically Based Rendering (PBR) or the bloom effect you can see in the video. My second attempt at digging into advanced 3D rendering lead me to the first step of creating the 3D model viewer. The process began with me playing around with some simple tutorials that taught me the what it takes to at least render something to an OpenGL canvas. Once I was able to simply render an unshaded cube out to the screen, thanks to my pass experience with shader code, I knew exactly what to do next. I started writing an OBJ file processor. OBJ files are the simplest type of 3D model files that stores all the information for a 3D model inside of a text-based file. Parsing an OBJ is a piece of cake. But there are things that OBJ files do not encapsulate and the processor has to infer by itself. OBJ files do not store the surface tangent vector used to apply normal maps to the material. I needed to take some time off and research on how to implement the tangent vector generator. After some vector algebra, I was back on track to progress on the viewer. I then was able to apply the textures and normal maps to the model but I didn’t have any ambient lighting. The background of the viewer was just black. That’s when I looked into implementing environment maps and how to use it to light the scene. I have yet to fully implement the environment map that adheres to modern graphics standard but I have a very clear plan for it in mind. After (half-way) implementing the environment map, the viewer was more or less functional and could be used to view some 3D models with satisfactory visual quality.

(Left-click and drag to rotate. Right-click and drag to pan.) 

  But most of the lighting calculations were all my own approximations and parameter tweaking. That was when I started digging into learning PBR shading. I spent another couple of weeks looking at articles and papers on PBR and what was used as the industry standard. That was when I came across this article. It lays out all the equations for Physically Based Rendering used in the Unreal game engine. I rewrote my shaders based off of that article and put in some of my own parameters. The result is a much cleaner and more modern looking 3D Viewer.

(Left-click and drag to rotate. Right-click and drag to pan.) 

    At this point I was very satisfied with the result. But there was a tiny problem, because I wanted to make the viewer look professional, I naively implemented the bloom effect into it as well. The problem with the bloom effect is that it requires multiple iterations of blurring and that is detrimental to the performance of the viewer. For a period of time, the viewer was almost unusable on low end computers. I thought long and hard about it and all of a sudden, a brilliant idea came to my mind. Because I was going to blur the image anyways, I didn’t have to apply it at full resolution. All I needed to do was downscale the canvas down and apply the blur filter at the lower resolution and linearly scale the image back up. I quickly applied that idea to the viewer and its performance increased significantly. The viewer ran smoothly even on my old $350 laptop. Also the effect looked a lot better and more prominent because the linear scaling added more blur to the bloom.

(Bloom effect at full resolution. The blur filter is not as prominent and performance was very bad.)

(Bloom effect at low resolution. The blur filter is amplified by the lower resolution and linear scaling. Performance is as good as not having the bloom effect at all. I was also able to apply more blur iterations thanks to the performance boost.)

   All in all, I still have a long way to go with the 3D viewer such as applying environment maps properly and not just query lower MIPs to get the blurry effect on rough surface. I also plan on implementing light shadows, which I also have a solid plan to do. I’m still very happy and proud of what I have so far.

Unpacking Manuel’s Tavern Update

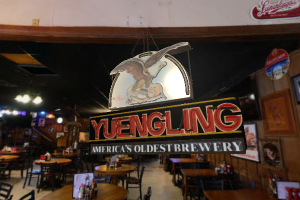
Unpacking Manuel’s is a project aimed at preserving the condition of Manuel’s Tavern before the renovation. The tavern had had the same setting ever since the 1960s. My task in the project in particular is to work on and manage the 3D aspect of the project. I work closely on the Unity build and asset management. So far we have finished the left wall in the main room of the tavern. I’ve also been experimenting with WebGL (not the Unity WebGL build) and try to create a 3D model viewer that we can directly embed on a webpage. This will become a useful visualizer for the asset database that we are planning on creating.

Here’s the working prototype of the viewer:

(Your browser needs to support WebGL).

(Left-Click and drag to rotate. Right-Click and drag to move. Scroll mouse to zoom).

Also I have implemented a means to view the projects connected to the picture frames on the walls in the Unity build. I have been a fan of skeomorphic designs when it comes to game design. That’s why the details viewing instrument disguises as a clipboard.

In VR, users can hold the clipboard and flip through the pages with their hands.

Manuel’s Tavern VR Demo

Hi guys,

We have made a lot more progress on the Manuel’s Tavern project. This time, with the collaboration of other SIF fellows, I was able to put together a sneak peak to the future of the project. Users can now look at the picture frames and have some information pop up to annotate the object. Until we get the database figured out, for now the annotations are just in forms of title text boxes. Take a look.


Manuel’s Tavern project’s progress

Hi guys,

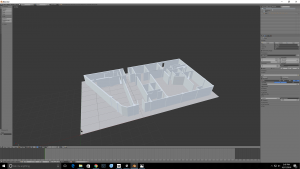
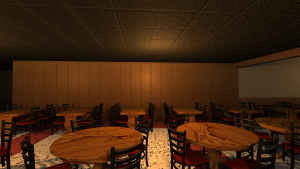
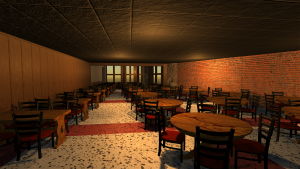
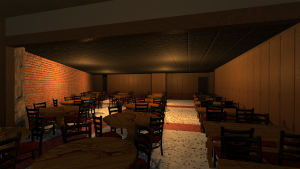
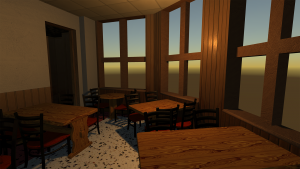
I am very excited to be put on this project. I’ve been a fan of 3D graphics and game design. This project has all of it. The goal we are trying to achieve with this project is to recreate the soon-to-be-renovated Manuel’s Tavern. This particular tavern has a really deep history root in Atlanta. We also have students working on the artworks in classes and we’ll incorporate them into the project. I am working on the 3D modeling and VR integration part of the project. It started out with the extrusion from the floor plan that Arya from Emory created (thanks!!!).
screenshot-12

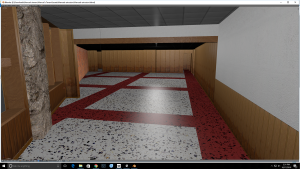
I added some details and adjusted the ceiling height then put in some textures…
screenshot-11

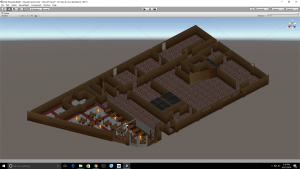
The whole thing is dumped over to Unity for composition. We will use Unity to incorporate the students’ project.

screenshot-10

Here’s one of the walls we’re going to hang the students’ project:

screenshot-5

We hope to achieve this:

screenshot-13

The whole project will be demonstrated in VR with the project information annotated into each picture frame and users will be able to see them as they glance at the picture.

screenshot-8
screenshot-3
screenshot-4

As a 3D graphics enthusiast, I pay a lot of attention to the aesthetics of the models. I tried to make the materials as realistic as I could. Materials play a big role in quality of the scene. Good materials can make scene from looking like this:

screenshot-16

To looking like this:

screenshot-17

screenshot-6

This wall was actually sampled from the wall in my room 😀

screenshot-7


3D Atlanta big update

Image

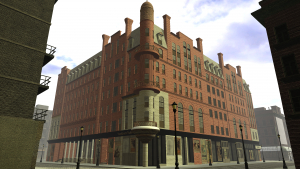
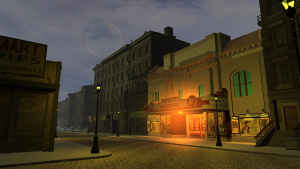
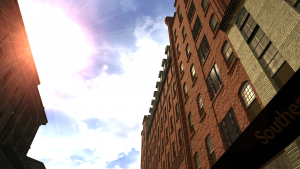
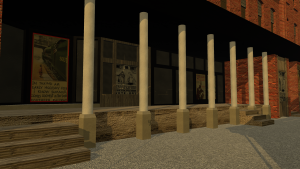
It has been over half a year since the last update on the 3D Atlanta project. Nonetheless, the project has constant been evolving and maturing. The 3D Atlanta group and I have been high at work to contribute our best to the project. At the time of the previous update, the project had a few buildings at the corner of Decatur and Central Ave. We have since expanded from that corner to cover the city block bounded by Pryor, Decatur, Wall St, and Whitehall St (now Peachtree St SW). We also 3D modeled and situated one of the most important and historical landmark of Atlanta, the Kimball House.

screenshot-3

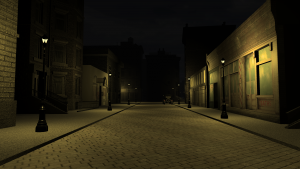
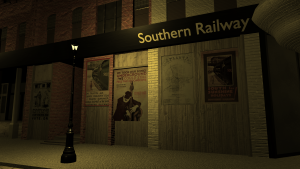
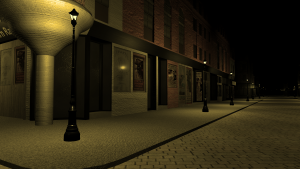
As a 3D graphics enthusiast, I spent a good deal of attention to the visual aspect of the project. The project, for now, is in form of a game created in the Unity game engine which gives users the ability to try out the immersive experience of virtual reality with stunning graphics capability. Users will be able to relive the old Atlanta in both the lively daytime and quiet night time. The day and night cycle is automated seamlessly giving the expression that the world is changing day by day in the game. Here are a few screenshots from the project to give you a closer look at what we have been up to.

screenshot-2

(Corner of Central and Decatur looking North)

screenshot-7

(Kimball House Wall St side)

screenshot-8

(Kimball House Pryor side)

screenshot-18

(Bailey’s 81 Theatre at the break of dawn)

screenshot-5

(Kimball House in the afternoon)

screenshot-15

(Kimball House Wall St side in the evening)

All in all, I am very excited about what we can do with Unity and how promising the future of the project is. Also, we are collaborating with Emory, who is also working on a similar project, to combine our effort in making the project more grand. I hope you are as excited as we are.

My very first post

Greeting friends.

My name is Chinh Le (I often go by Jack… wait I take that back, I always go by Jack) and I am a senior undergraduate Computer Science major at GSU. I came to the SIF in a very rare and sudden opportunity. I was referred by SIF member, who at the time was a Physics Labs TA and I was an LA (Learning Assistant, a rather new position in the physics labs that recruit only undergrads.) Surprisingly, the reason I was recruited had nothing to do with Physics. I am here at the SIF as a web developer, 3D modeler, animator, and programmer. This is an amazing opportunity for me in my pursuit in the field of Computer Science because this is the very first position where the skills that I go to school for is used.

I was born in a small Southeast Asian country of Vietnam. I have only been in the U.S. for 3 years (I came in the Fall of 2012, to start my college education) though you may not have guessed when you first meet me. Before coming here, I did quite a bit of practicing in English both speaking and writing. During that time, I trained myself to stop thinking in my native language, watched tons of American TV shows, and read hundreds of American news articles. My hard work had, apparently, paid off when I heard feed backs from my friends. Most of them thought that I was born here. That was a big delight for me.

My family has always had a computer since I was born. I learned how to play video games on it before I learned how to speak. But I’ve always had an unsettled feeling about almost everything that I use everyday. I feel they can always be improved. That persistent feeling eventually led me to asking my father to teach my how to program. But things weren’t quite that simple. My father refused to teach me because I was very little and did not have enough knowledge to even start. Being so stubborn of a child I was, I finally succeeded and my father had to sit me down and teach me the most basic concepts in programming. I wrote my first program when I was 7 and I have been coding everyday ever since. Programming has always been the window for me let my creativity soar.

I will do my best to contribute as much as I can to the SIF. My new journey starts here.